
A modest start.
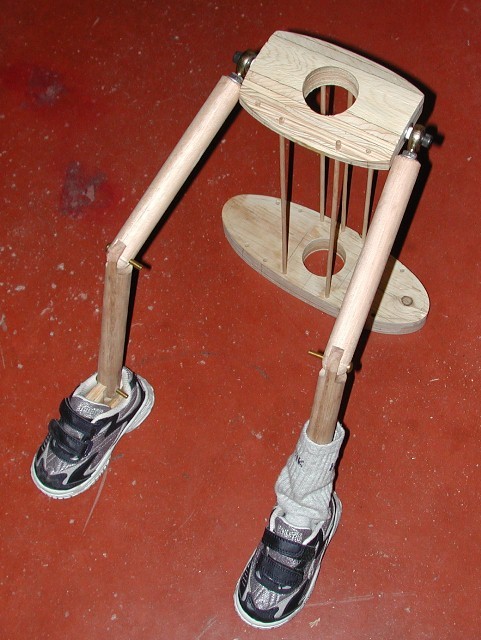 |
These are the legs and torso. The torso is upside down with what
will become the shoulders flat on the floor of my shop. I used
Heim joints for the hips and later for the elbows.
|
Got arms.
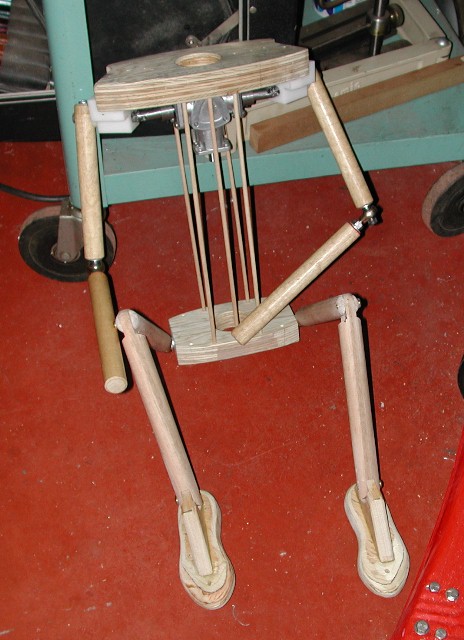 |
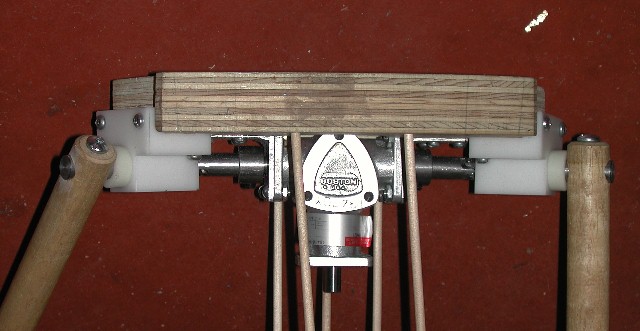
A little more progress here. Got the arms and steering mechanism working.
The motor, gearbox and spring loaded clutch will be mounted on the hip plate.
A flexible shaft will connect to the shoulder gears and the body is designed
to twist somewhat. That way, when steering, the shoulders move slightly
into the direction of the turn.
|
Look ma. No shoes.
 |
The feet are to be covered in socks: then shoes. So I didn't worry too much
about getting the details right.
|
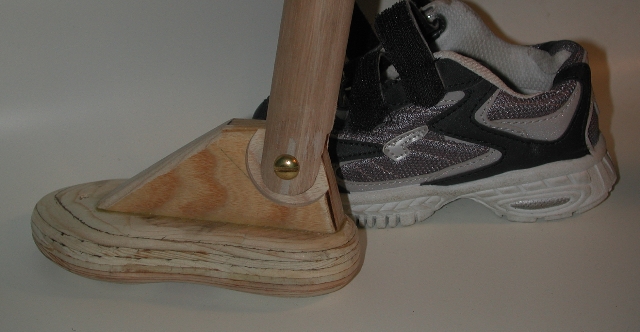
They do it with magnets.
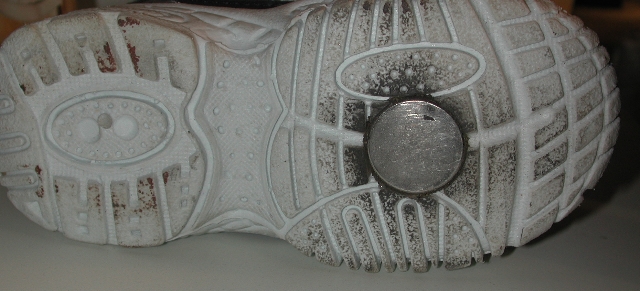 |
I cut holes in the bottom of the shoes and used "Goop" to glue magnets in.
Then put small steel plates on both sides of the pedals. That way the feet
tend to stay on the pedals but move about in a more natural way during turns.
|
When the left arm moves forward...
 |
the right arm moves backward. Got it? The gearing here is set up so that
when the center shaft turns, the arms move in opposite directions.
|
The power is in the hips.
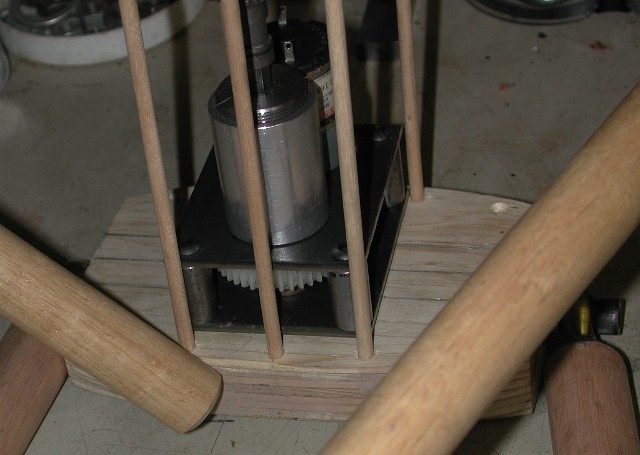 |
The motor, gear box and spring loaded clutch was built as one assembly and
mounted at the hips. There are no limit switches so the clutch was
put in to start slipping once the arms moved as far as they could go.
|
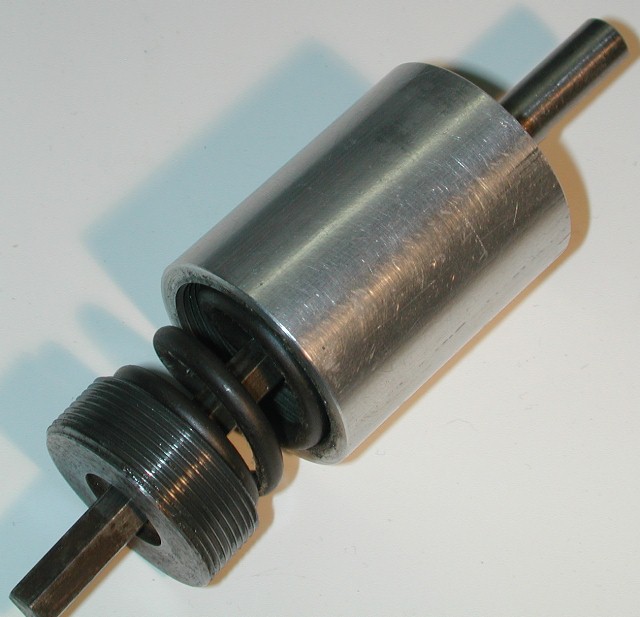
This is the spring loaded clutch.
 |
You don't see very much here. Just a cylinder with two shafts sticking out.
|
But when you open it...
 |
you start to understand what's going on inside.
|
The center piece...
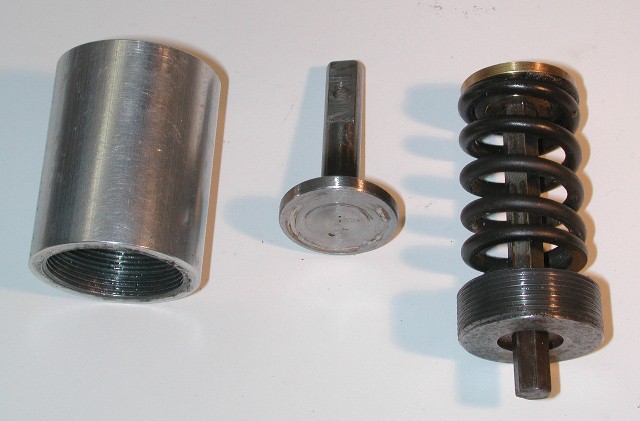 |
is squeezed between the piece of brass on the right and a bronze
bearing that is part of the cylinder. I can adjust the tension by
turning the hex shaft. Bit of a trick to "load" this thing as the
shafts must be almost dead concentric. I use a small lathe as a jig
and screw everything together carefully so as not to damage the threads.
|
Hand start.
 |
The hands were cast from life. I had a young boy hold the handles while
dipping his hands in alginate. When he removed his hands I poured a casting
plastic into the resulting mold. I had about the right color plastic but the
resulting casts had a lot of
air pockets. So I had to patch them up using automotive body filler.
|
Then I tried to get the right color paint.
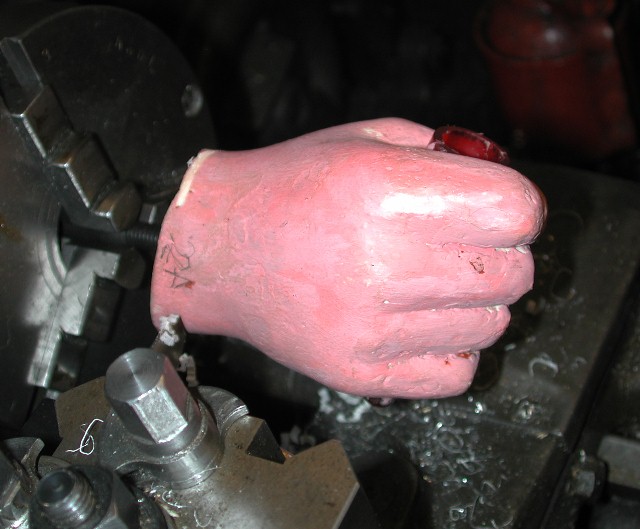 |
But there was too much red in the batch. Well at least I got rid
of the Halloween prop look. In this picture I was turning one of the hands
in the lathe to square off the wrist.
|
The wrist movement...
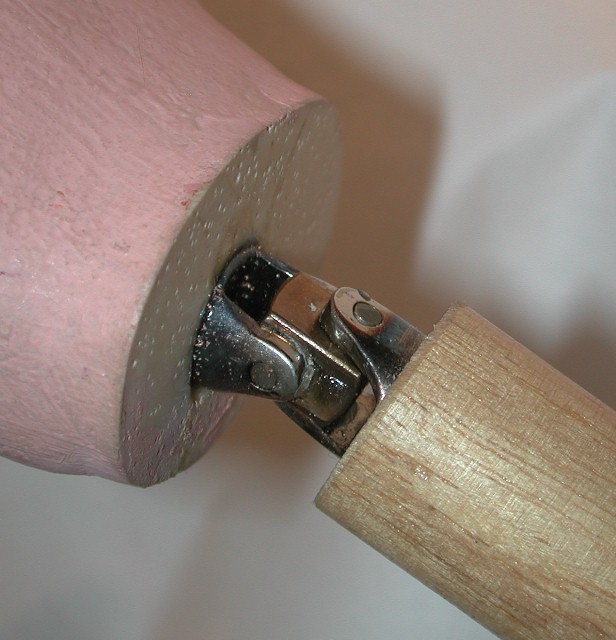 |
was done with 1/4" socket drive universal joints which I picked up
at Princess Auto. A little hacking, drilling and gluing resulted in
wrists that moved very well.
|
This was the original...
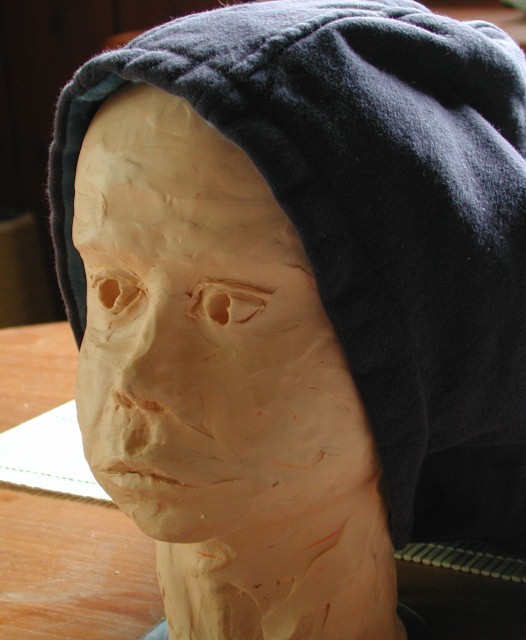 |
clay model of the head I wanted to use. But there were some er... artistic
challenges along the way and I decided to go with the hairdressers mannequin
that you see further on.
|
Every good dummy deserves...
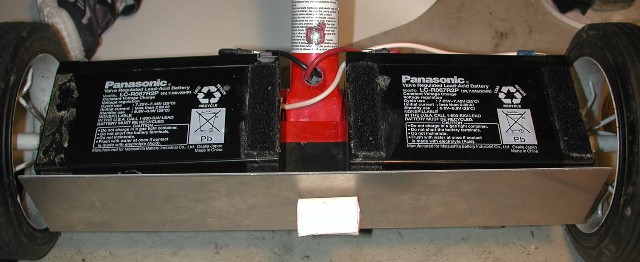 |
good batteries. I tried 12 V jobs at first. I've got loads of those around
my shop. But they didn't look right. So... Another trip to into town to get the two
six volt jobs that I wired in series.
|
This is the drive mechanism.
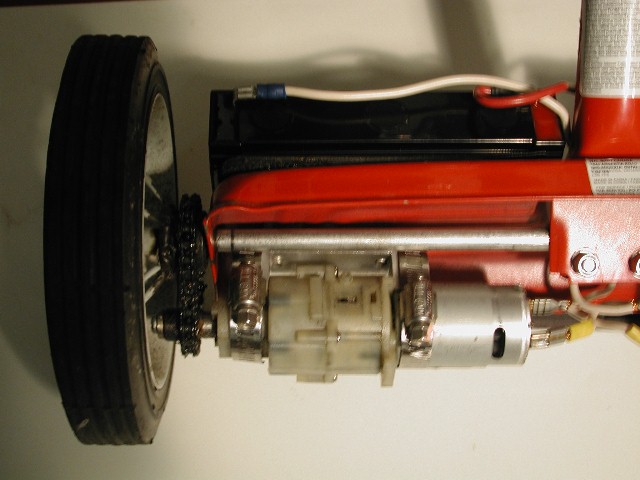 |
I use cordless drill motors with no. 25 sprockets and chain.
Done this sort of thing before and it usually works well. But this
time I got the chain a little too loose and it skips if you apply too much
power. So back to the shop it must be.
|
Stick boy.
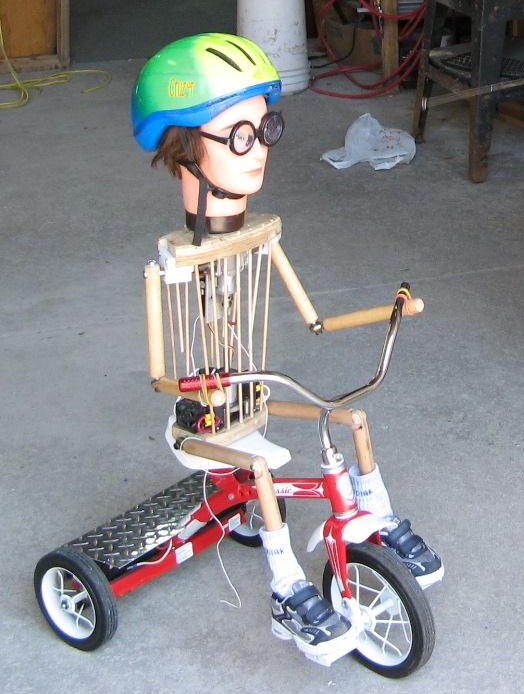 |
Got most of the functionality in place here. Just needs a little dressing
up and he should be good to go. Wait! No hands!
|
Stick boy...
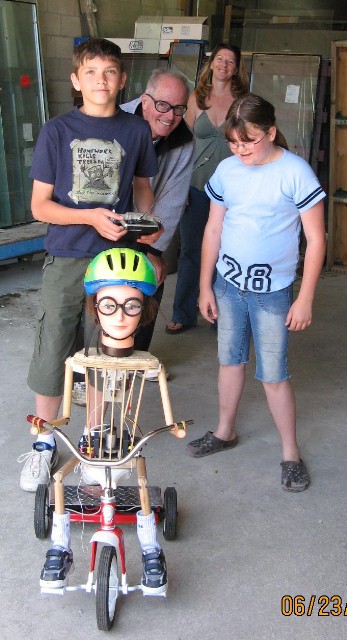 |
with friends. Come on. Even stick boys have friends!
|
The final result.
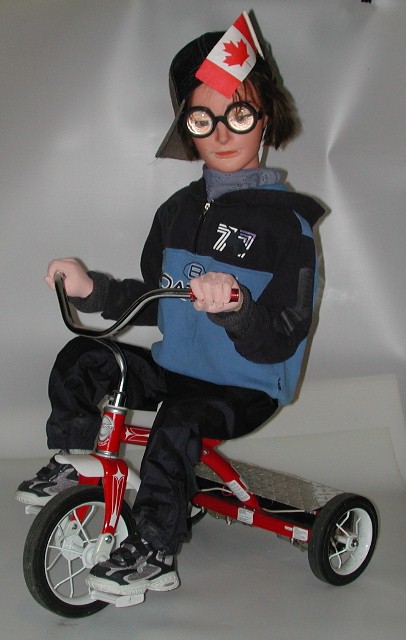 |
OK. It's just final until I make more changes. And just in case you were
wondering... He is not supposed to look like me or a certain movie character
that is currently popular!
|
One brain transplant coming up.
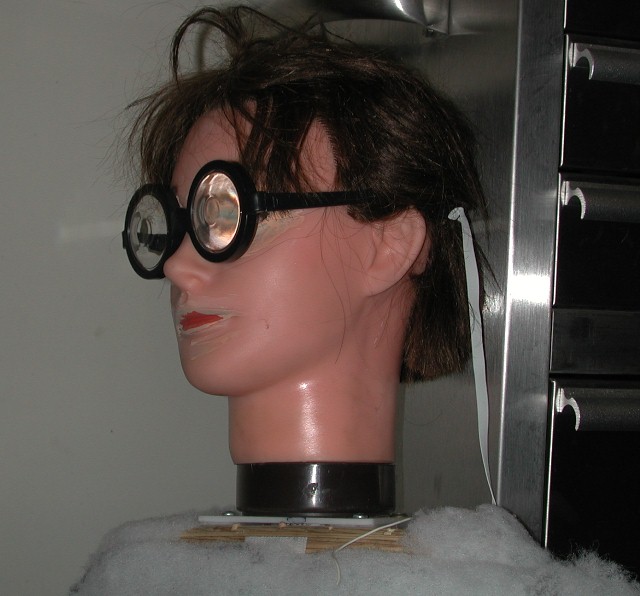 |
Well, it's probably more like a head transplant. This is the current head. Looks kind of
like the hospital waiting room. And who wouldn't feel rather pale? :-)
|
And the donner is...
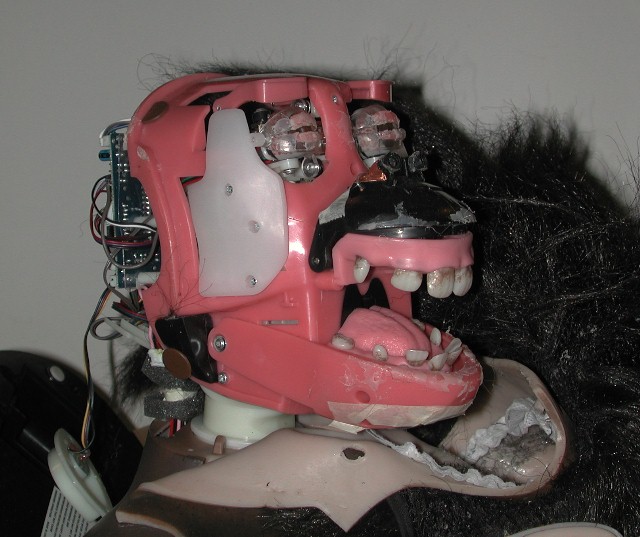 |
The stripped down Wow Wee Chimp head. I plan to use this as the
basis of the new MyDummy head. A certain amount of skull
surgery will be necessary. And a trip to the dentist, of course!
Controlling the servos should be interesting. I've already bought a Propeller kit from Parallax. Humm... The multi-processing brain to come! |